Wednesday, August 5, 2015

"Wishy-Washi" Tape Greeting Cards

Ha, ha. Do you get that pun there? Yeah, that came to me last night after I made the washi tape cupcake. I thought, "How perfect. Wishy Washy, but Wishy-Washi. Wishy washy means that you are feeble, indecisive, and/or lacking in boldness. AKA, not to be all timid and feeble and get off on a rambly tangent, but I've been thinking that I want to tell you how much you mean to me. Wishy-washi.

SO, if you have anyone in your life who needs cheering up, you can do so with my somewhat incorrect if funny pun. Enjoy.


Supplies: 
  • Cardstock
  • Crazy Scissors
  • Washi Tape
  • Glue
  • Plain White Paper
  • Regular Scissors
  • A Sharpie


First, I made my washi-tape cupcake like shown below. Basically, using a pen that will bleed through to the other side of the paper, draw the shape you want (I chose a cupcake, obviously), and then cover it in washi tape. It is okay to go outside the lines. Then, turn the paper over to the back and cut out the shape. Depending on the pen you use you might want to layer up on the washi tape. 


  Now, it's time to make the card. Cut out some cardstock into the desired shape and fold in half. I used those crazy scissors to cut around the edges of the card before folding. Now, get your washi tape and, starting at the front outside edge of the card (where you open it), wrap the tape around to the back. I staggered where my tape started and ended like below.


Now, you want to pick up the washi tape shape (my cupcake) that you made and glue it to a plain piece of white paper. Then, trim around the edge so that your shape has a white border. I did this so that it stood out against my background, but if yours stands out fine you can skip this step. 


Now, glue it down onto your card, and, using a Sharpie or other permanent marker, write your message on the card. I said "Not to be all wishy-washi," but you can do whatever you like. 


Now all that's left to do is write your message inside the card (such as, "but i've been thinking about telling you how much you mean to me. So here goes. Thank you for all you do, and um, I hope you feel better soon. And do you, um, like my joke?")

Well, that's my Wishy-Washi greeting card. What do you think? Let me know in the comments!  
  

Tuesday, August 4, 2015

An On-the-Fly Invention: Fried Apples

The heat was on, but the power was out. Me, my two brothers, and my six-year-old sister were at my grandma's house during a power outage. Now, being the avid Food-Network-Watchers we are, the idea came to me- We should have a "Chopped!" Chopped is a Food Network competition in which chefs have to create a dish using ingredients provided in a basket, plus others of their choosing. We knew it was a brilliant plan.

So, in a competition, I remembered that a girl on Kids Baking Championship made some apple "fries." So I decided to whip some up to add to my applesauce-y pancake breakfast.

And they were good. 

This recipe is easy, you probably have all the ingredients (I'm a big fan of recipes that only use ingredients we actually have on any given day), and it takes under five minutes and less than five ingredients to make. Here we go!


Ingredients: 

- Apples: I have used Gala and Fuji apples and they both turned out ok.
- Powdered Sugar
- Cinnamon
- A little bit of Crisco

To make, get a cast iron or other skillet, it doesn't matter too much, and grease with the Crisco. Then, turn the heat up to "high."

Then, take your apples and chop up into large chunks or slices, it's up to you. No matter which one you choose, no piece should be too small, because then it will cook too fast and loose the slightly crunchy, apple-y texture.


Now, sprinkle your apple slices with powdered sugar, like below. I can be pretty heavy-handed with this step.


Now, put the sugar-covered apples on the skillet and sprinkle with your cinnamon. Use enough to get a cinnamon flavor but not so much that it's "too much."


Let the apples "caramelize" on the outside and flip them over to the other side(s). Be careful to keep the apples from burning! It shouldn't take long at all for them to cook.  

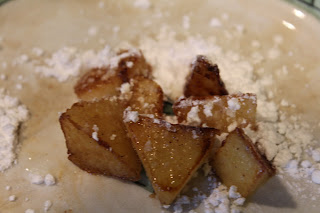
Finally, remove the apples from the heat and sprinkle with powdered sugar. 


Let me know what you think of this recipe in the comments below, and please check in soon for more recipes and projects!